

Bandsaws are versatile tools in woodworking, offering precision and versatility for various projects. From intricate cuts to resawing lumber, mastering the bandsaw can elevate your DIY woodworking projects. This blog post will guide you through essential tips and techniques for using a bandsaw effectively, ensuring your woodworking is both enjoyable and successful.
Choosing the Right Bandsaw for Your Needs
Understanding Types and Sizes
When selecting a bandsaw, consider the types and sizes available. Band saws come in two primary types: floor-standing cabinet models for heavy-duty work and smaller, benchtop models for less intensive tasks. The size of a bandsaw is determined by its throat, which is the distance from the blade to the frame. This measurement dictates the width of the cut that can be made.
Larger bandsaws, with a throat size of 12 to 24 inches, are ideal for cutting thicker materials and resawing. Smaller bandsaws, typically with a throat size of less than 12 inches, are more suited for detailed work and curved cuts. The choice depends on the projects you plan to undertake. For general DIY woodworking, a bandsaw with a throat size of 14 inches is a versatile option.
Selecting Blades and Accessories
The blade is a critical component. Different blades are suited for different types of cuts:
- Narrow blades are best for intricate, curved cuts.
- Wide blades provide stability and are ideal for straight cuts and resawing.
The blade’s teeth per inch (TPI) also influences the cut. A higher TPI results in a smoother cut but slower feed rate, while a lower TPI allows for faster cutting but with rougher results. Additionally, consider investing in quality accessories like a good miter gauge, rip fence, and blade guides. These accessories enhance precision and safety during operation.
Setting Up Your Bandsaw
Proper Installation and Alignment
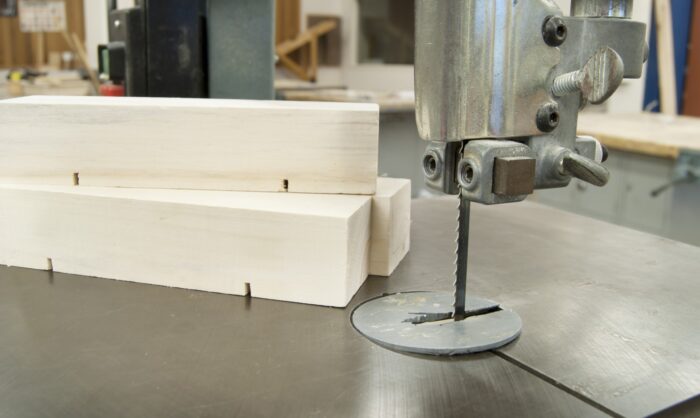
Setting up your bandsaw correctly is crucial for optimal performance. Ensure the bandsaw is securely mounted on a stable surface. If it’s a floor-standing model, it should be bolted to the floor. For benchtop models, secure them firmly to the bench. After installation, align the blade according to the manufacturer’s instructions. This process typically involves adjusting the blade tension, tracking, and guide bearings.
Proper blade tension is essential for accurate cuts. A blade that’s too tight can break, while one that’s too loose can lead to inaccurate cuts. Use the tension scale on your bandsaw as a guide, but also rely on your judgment and experience. The blade should be tight enough to resist deflection but not so tight that it’s under excessive strain.
Adjusting for Precision Cuts
To achieve precision cuts, fine-tune your bandsaw’s settings:
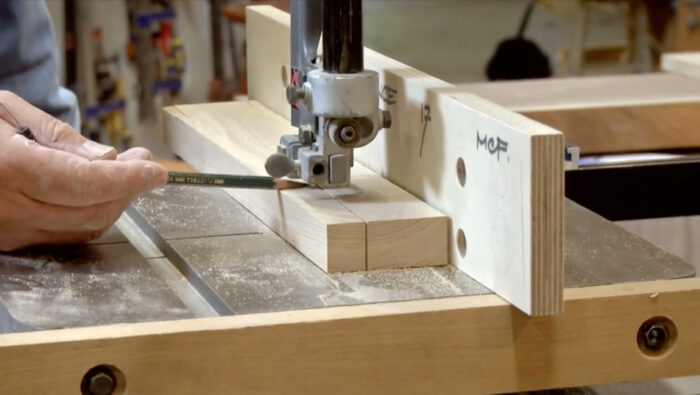
- Blade Guides: Adjust the blade guides to support the blade without binding it. They should be close to the wood without touching it during a cut.
- Table Squareness: Ensure the table is square to the blade for accurate cuts. Use a square to check and adjust as necessary.
- Fence Alignment: If your project requires straight cuts, align the fence parallel to the blade. For resawing, a slight fence angle might be necessary to compensate for blade drift.
Regularly check these settings, especially after changing the blade or undertaking a different type of cut. Consistent accuracy in woodworking requires ongoing attention to your bandsaw’s calibration.
Mastering Bandsaw Techniques
Making Straight and Curved Cuts
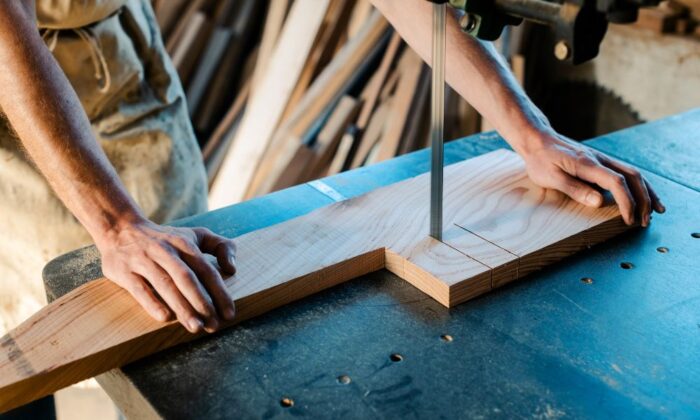
Straight cuts are fundamental in woodworking, and a bandsaw can excel at them with the right technique. For straight cuts, use a rip fence or a miter gauge to guide the wood. Feed the wood steadily and evenly, allowing the blade to do the work without forcing it.
Curved cuts require a different approach. Start by drawing your desired curve on the wood. Then, using a narrow blade, guide the wood through the blade, following the line closely. Keep the wood moving steadily, and avoid twisting or turning it abruptly, which can cause the blade to bind or veer off course.
Resawing and Crosscutting Techniques
Resawing involves cutting a piece of wood along its thickness, creating thinner slabs or veneers. This technique requires a wide blade for stability and a slow, steady feed rate. Ensure the wood is firmly against the fence and feed it evenly through the blade. Monitor the cut to ensure it remains straight throughout the process.
Crosscutting, or cutting across the grain, is another common bandsaw task. Use a miter gauge to ensure a precise angle and a smooth, controlled feed rate. For both resawing and crosscutting, keeping the wood firmly against the guide without forcing it is key to clean, accurate cuts.
Advanced Techniques and Safety Tips
As you gain confidence with your bandsaw, explore advanced techniques like cutting dovetails or creating intricate inlays. These tasks require practice, patience, and often, specialized blades.
Safety is paramount when using a bandsaw. Always wear appropriate safety gear, including eye and ear protection. Keep your fingers away from the blade, using push sticks or feather boards for close cuts. Never remove cut-offs or scraps while the blade is moving, and always disconnect the power when changing blades or performing maintenance.
Conclusion
In conclusion, a bandsaw is a powerful and versatile tool in the DIY woodworker’s arsenal. By choosing the right bandsaw, setting it up correctly, and mastering various cutting techniques, you can achieve precision and creativity in your woodworking projects. As you continue to explore the capabilities of your bandsaw, consider experimenting with different types of wood and cuts. Each species of wood has its unique characteristics, which can affect how it interacts with the bandsaw blade. Softwoods can be more forgiving and easier to cut, making them ideal for beginners to practice their techniques. Hardwoods, while more challenging, offer the opportunity to create truly stunning and durable pieces. By varying your projects and materials, you’ll not only broaden your skillset but also gain a deeper appreciation for the art of woodworking. Remember, each project is a learning experience, and with each cut, you’re honing your craft and expanding your creative possibilities.


