

Modern dairies and beef operations don’t just “watch” their cows anymore – they measure them. A well-implemented cow monitoring system turns behavior and health signals into clear actions: breed this heifer today, check that fresh cow now, adjust feed for this pen tonight.
Below is a practical, deeply explained guide to what these systems do, how they pay for themselves, and how to pick and roll one out without disrupting your routine.
What a Cow Monitoring System Actually Includes
Think in layers rather than gadgets. At the animal level, you’ll have a tag or collar capturing activity, rumination, temperature, and sometimes location. That data flows to a base station or reader, then to a local server or the cloud. On top sits your dashboard: heat lists, health alerts, and trends you can sort by pen, lactation, DIM, or parity. The value isn’t the sensor itself; it’s the decisions the dashboard helps you make in real time.
A solution like a dedicated Cow Monitoring System pairs durable neck or ear tags with a farm-ready dashboard you can use on a phone in the parlor or a PC in the office. What matters is less the brand name and more whether the system fits your barn geometry, internet reality, and preferred workflows – and whether the provider trains your team, not just installs hardware.
Typical sensor signals you’ll use:
- Activity & step counts to flag heats and lameness risk.
- Rumination & eating time to catch subclinical issues early (feeding, transition health).
- Temperature for fever detection, heat stress response, and calving watch.
- Positioning (optional) to find animals faster and study cow flow.
Where This Pays Off (and How Fast)
Most farms see payback through three channels: reproduction, health, and labor.
- Reproduction ─ Better heat detection means fewer missed cycles and a tighter calving interval. When your list shows “inseminate today” with confidence, services per conception fall, and days open shrink. On the beef side, estrus and breeding windows are easier to manage across larger pastures.
- Health ─ Rumination drops before you notice a dull eye or reduced intake. Acting on that data – temperature check, ketone strip, TMR tweak – keeps cases mild and recoveries quick. Earlier mastitis or metritis intervention protects milk and fertility.
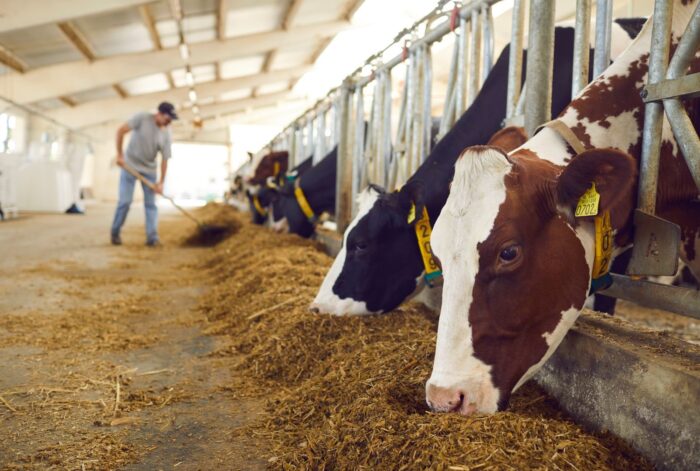
- Labor ─ You’ll still walk pens, but you’ll walk with a purpose. Instead of scanning 200 heads, you check the 6 names on your phone. Night checks shift from “maybe” to “because the data said so,” which saves hours and improves consistency across shifts.
A simple, conservative example: preventing just five missed heats per month and catching three illnesses a day earlier can exceed a system’s monthly cost on many mid-size dairies – before you count labor saved.
Everyday Use Cases You’ll Lean On
These are the moments when the system actually earns its keep: routine tasks you already do, but now guided by timely data. Use the lists as your cue, confirm in the pen, and act while the window is still open.
1. Heat detection, you can schedule around
Morning lists show who’s peaking and who’s tailing off, so you can time insemination precisely, route animals while they’re already headlocked, and reduce rebreeding work.
2. Fresh cow and transition health
Rumination alerts after calving are gold. A drop at 3 a.m. tells you to check ketones at 6 a.m., not two days later when a cow goes off feed. Small interventions beat big treatments.
3. Lameness and comfort
A steady decline in activity or time-at-bunk can point to hoof issues or overcrowding. You’ll fix the reason – not just treat the limp.
4. Heat stress playbook
Temperature and behavior trends cue fans, misters, ration salt/buffer adjustments, or schedule changes before cows tip into reduced intake and milk loss.
Metrics That Prove It’s Working
You don’t need twenty KPIs. Track a tight set and review them weekly:
- Repro ─ heat detection rate, conception rate, days open, services per conception.
- Health ─ new case counts (mastitis, metritis, ketosis), average severity, retreat rates.
- Production ─ milk per cow, somatic cell trends, cull reasons linked to alerts.
- Labor ─ time spent on checks vs. interventions, after-hours call-ins.
If the system is helping, you’ll see fewer surprises and steadier trends, not just prettier charts.
How to Choose a System You Won’t Regret
Before you compare spec sheets, decide how the system will live in your day-to-day. The best choice fits your barn geometry, connectivity reality, and staffing patterns—and it comes with people who’ll help you turn alerts into routines, not noise. Use these two checkpoints to pressure-test any proposal.
Evaluate fit, not just features
Walk the vendor through your barn layout, Wi-Fi or cellular constraints, and where you’ll mount readers. Ask for a coverage plan and sample dashboards built to your herd structure—fresh, high group, late-lactation, heifers—so the daily lists match how you already manage.
Confirm tag form factor and battery life for your environment, clarify data ownership and export options, and insist on offline buffering so you aren’t blind during internet hiccups. Finally, verify integrations with your herd software and parlor/milk meters before you sign.
Insist on training and support
Hardware is day one; training is day 100. You want role-based onboarding for managers and milkers, clear SOPs for handling alerts, and a named support tech who knows your site.
Expect threshold tuning over the first 60–90 days to reduce false positives without missing real issues, plus a quarterly review of repro, health, and labor metrics tied to the system. If the vendor can’t show this playbook, keep looking.
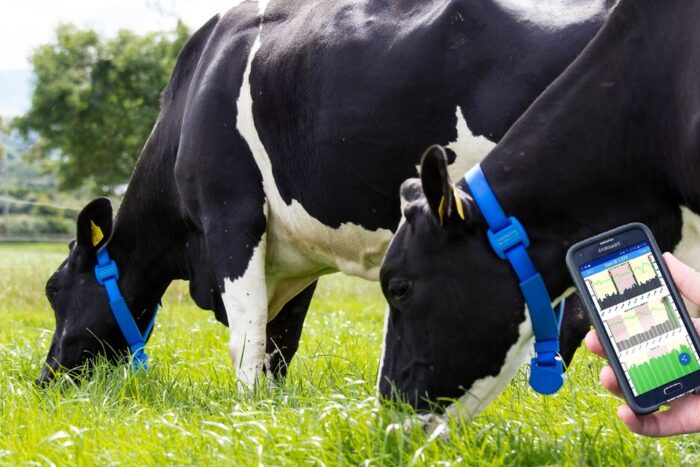
Table: Rollout Plan 0–90 Days
|
Window |
Focus |
Key actions |
| Days 0–14 | Foundations | Install hardware; confirm coverage; integrate with herd software; set alert priorities (start with fresh-cow health and peak-heat lists); optionally launch a small pilot pen to pressure-test. |
| Days 15–45 | Team habits | Add the dashboard to morning meetings; assign owners for clearing specific alerts and timing; tighten noisy thresholds while keeping high sensitivity for fresh cows. |
| Days 46–90 | Prove value | Compare reproduction and health metrics to your pre-install baseline; document a few “saves” (e.g., early mastitis catch, heat detected overnight) to cement adoption and justify scaling. |
Integrations, Ownership, and Connectivity
Make sure the system exchanges data with your herd management software, parlor/milk meters, or feed system via a stable API.
Clarify who owns the raw data, where it’s stored, and how you can export it. If your internet is spotty, you’ll want local buffering and offline functionality so you’re not blind during outages.
Bottom Line
A cow monitoring system is not a luxury add-on – it’s a management layer that keeps your herd visible when your team can’t be everywhere at once.
The goal isn’t more data; it’s fewer surprises and faster, better-timed decisions. If you focus on fit, training, and a small set of meaningful alerts, the technology pays for itself in repeatable ways: tighter reproduction, earlier health wins, and smarter use of labor.
That’s what “smarter livestock management” looks like day to day – and why the farms that lean into it rarely go back to flying blind.


